Fonts play an important role in web and graphic design, influencing readability, aesthetics, and branding. Typekit, now known as Adobe Fonts, offers a structured way to access a wide range of high-quality typefaces for use in websites and desktop applications. This service simplifies font selection, integration, and management, allowing designers to focus on their projects without searching for individual font files.
What Are Typekit Fonts and Why Should You Use Them?
Typekit, currently called Adobe typefaces, is a service that works with leading typeface foundries to provide a diverse range of high-quality typefaces. Typekit, which was formerly offered as a standalone product, was integrated into Adobe Fonts in October 2018, resulting in various enhancements. Desktop sync constraints, web-only font restrictions, and pageview limits were lifted, and hundreds of new typefaces, including Adobe Originals choices, were added.
The site is based on a subscription basis, but it also offers a free tier with access to a restricted collection of typefaces. Individual fonts can also be purchased, and full subscribers have unfettered access to the complete Adobe Fonts catalog, which includes popular options such as Fira Sans and Acumin. Adobe Fonts is now part of Creative Cloud, therefore a Creative Cloud membership is necessary to utilize the service, which is available free with all plans. This connection provides designers with immediate access to typefaces in Photoshop, Illustrator, After Effects, and InDesign.
Subscribing to a font service may appear needless, yet it may be a useful resource for designers. Searching for typefaces online may be time-consuming, especially if you do not have a trusted source. Adobe Fonts makes this process easier by offering instant access to a large, high-quality font selection that can be utilized effectively in a variety of applications. Furthermore, clients may try the service for free before opting to upgrade. Using the right fonts can also help promote your blog by improving readability, enhancing visual appeal, and creating a consistent brand identity across digital platforms.
How to Create and Publish a Font Kit on Typekit
To utilize custom fonts on a WordPress website, they must first be loaded; this also applies to Typekit fonts. The procedure starts with signing up for Typekit, and it’s preferable to start with the free plan to learn about its capabilities before upgrading.
After registering, users may construct a font kit, which is a curated collection of chosen typefaces. Simply browse the Typekit collection for a font, then select Web Use: Add to Kit.
During the setup process, the platform will ask customers to name their kit and select which domains will utilize it. Typekit then gives an embeddable JavaScript code, which is required for integrating the chosen fonts into a WordPress site.
After you’ve added all of your selected fonts, go to the Typekit dashboard and click Publish. This step guarantees that the typefaces are available on any website related to the kit. Users may also choose from several font weights and styles, as well as define a fallback font that will be displayed if a visitor’s browser does not support the @font-face rule. By default, this fallback is set to Sans Serif.
How to Add and Use Adobe Fonts in Desktop Applications
Adobe Fonts is compatible with desktop applications such as Photoshop, Illustrator, InDesign, Microsoft Office, and iWork. These typefaces are suitable for a variety of applications, including print design, website mockups, and word processing.
Step 1: Install the Creative Cloud Desktop Application
Fonts are maintained via the Creative Cloud desktop application. If it is not already installed on your computer, download and install it from the Adobe website.
Step 2: Choose Fonts to Add
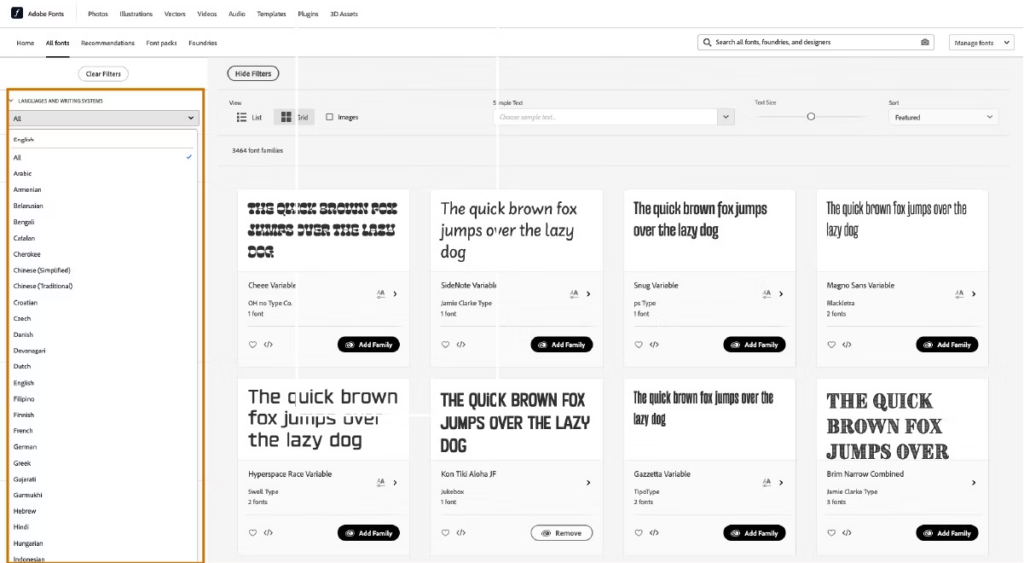
- Browse the Adobe Fonts library to find suitable fonts;
- Use the LANGUAGES AND WRITING SYSTEMS drop-down menu to filter fonts by language support;
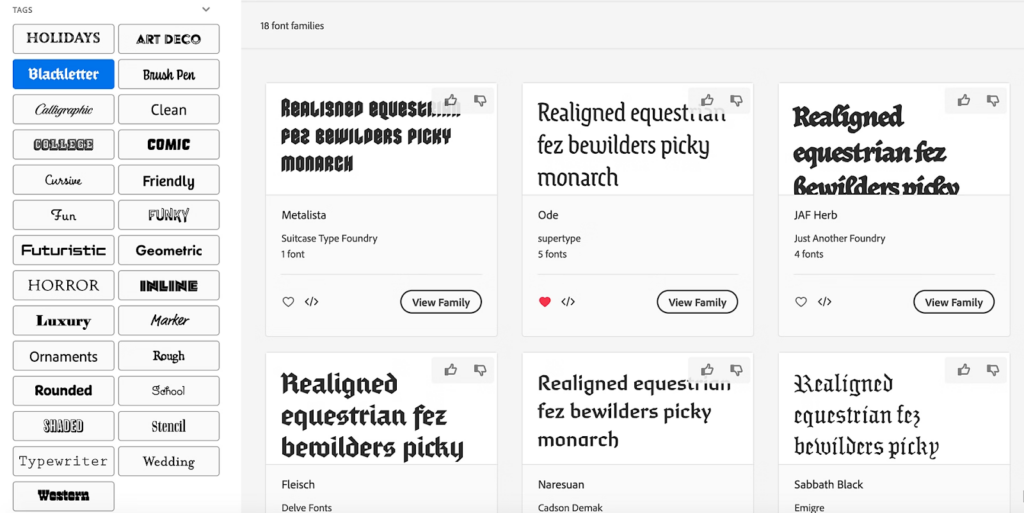
- Apply tags or filters to refine search results, such as:
- Mood-based search terms;
- Font classification (serif, sans serif, etc.);
- Properties like x-height, width, and weight;
- Japanese fonts include additional filtering options, such as kana-only fonts or style classifications (Mincho, Gothic, Maru Gothic, Brush).
Step 3: Add Fonts to Your Library
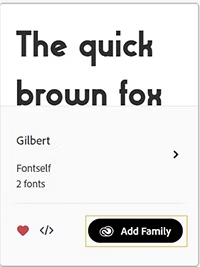
- Click on a font to open its family page;
- Select specific weights and styles, or add the full font family;
- Added fonts will appear on the Creative Cloud desktop, accessible through the Fonts menu (f icon) in the upper-right corner;
- If fonts don’t show up within a couple of minutes, refer to the troubleshooting guide.
Step 4: Use the Fonts in Your Desktop Applications
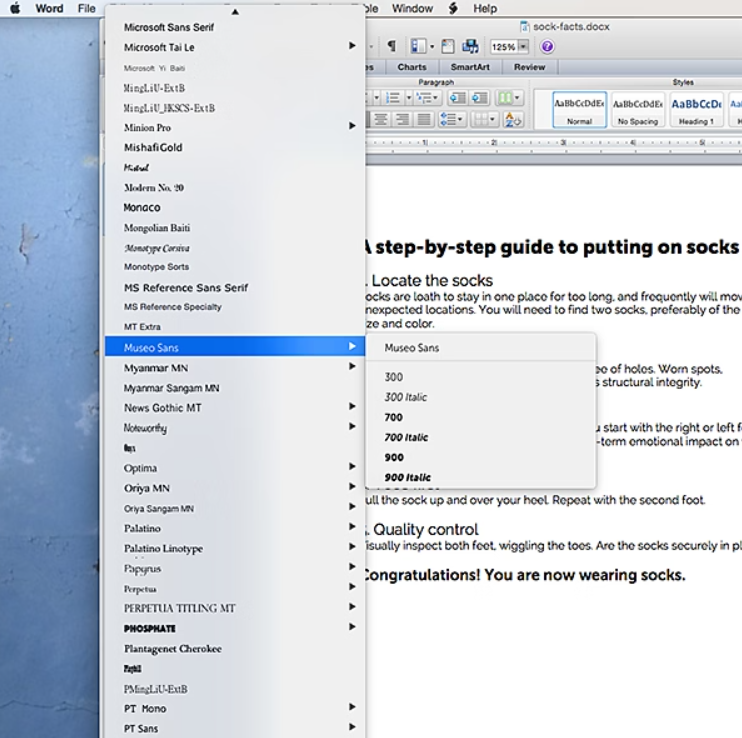
Once added, fonts will appear in the font menus of all compatible applications, alongside locally installed fonts. Most programs will recognize the new fonts immediately, but some, such as Adobe Acrobat and Microsoft Office, may require a restart for the fonts to be available. Added fonts are also listed under the Added Fonts tab on My Adobe Fonts, making them easy to manage.
There is no limit to the amount of typefaces that may be added, however, keeping the list brief can aid with efficiency. If a typeface is uninstalled, it is saved in the Previously Added tab, allowing for easy reinstallation when necessary.
Using Adobe Fonts in Third-Party Applications

Using Adobe Fonts in third-party applications may require reinstallation if a font has not been used for several months. To restore access, open the Creative Cloud desktop application, go to the Added Fonts section, and click Install next to the font name. Ensuring that the Creative Cloud software is up to date helps maintain smooth font management and prevents potential issues.
Using Adobe Fonts on Websites and Digital Projects
Adobe Fonts provides web fonts that can be integrated into various digital platforms, including websites, HTML email campaigns, and Google AMP articles. These fonts can be used in any project that supports web fonts.
To use Adobe Fonts, you must utilize the embed code provided by the Adobe Fonts web service. The Terms of Use prohibit self-hosting or uploading font files to website design platforms.
Selecting Fonts
Begin by browsing the Adobe Fonts collection and choosing the desired language support from the Languages and Writing Systems drop-down menu. To narrow your search, use tags and filters based on categorization (such as serif or sans serif), attributes (such as x-height, width, or weight), or mood-based natural language tags.
Creating a Web Project
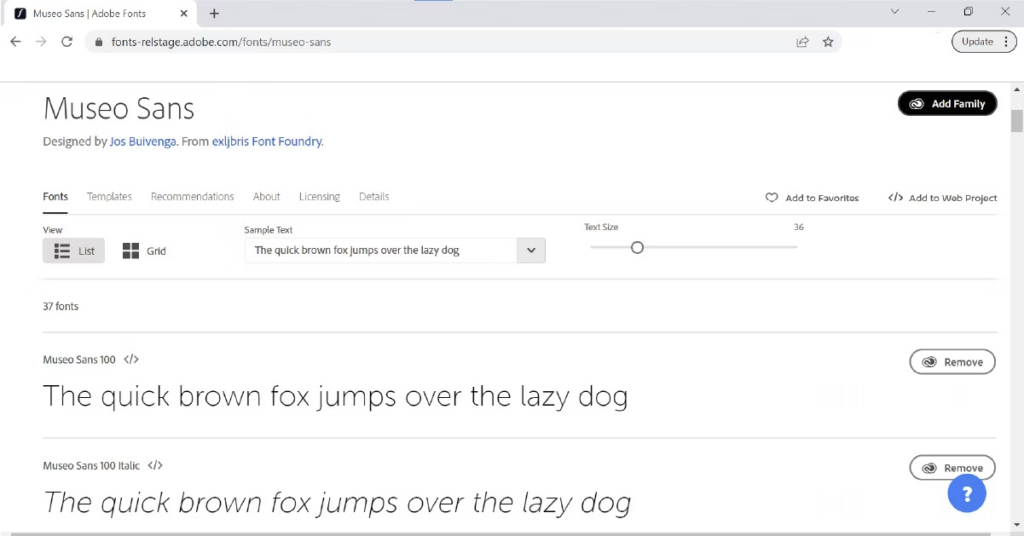
After selecting a font, click the </> button to add the font family to a web project. Alternatively, clicking on the font name opens the family page, where you can see all of the possible weights and styles. From there, select Add to Web Project to proceed.
In the Add Fonts to a Web Project window:
- Assign a name to your web project;
- Use checkboxes to select font weights and styles;
- Create the project.
You can modify the project settings later via the Manage Fonts page.

Embedding Fonts in Your Website
After building a web project, an embed code will be created. This code must be included in your website’s <head> element. The Adobe Fonts support website provides detailed instructions for embedding.
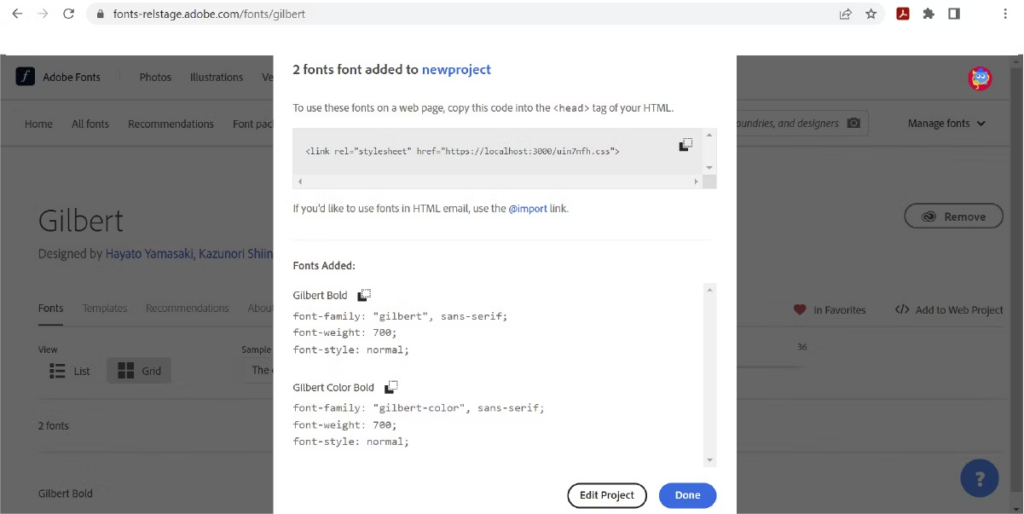
To add extra fonts to an existing project, click the </> button on another font family and choose the desired project from the menu rather than establishing a new one.
Managing and Customizing Your Web Project
All active web projects are accessible under Manage Fonts. Click Edit Project to:
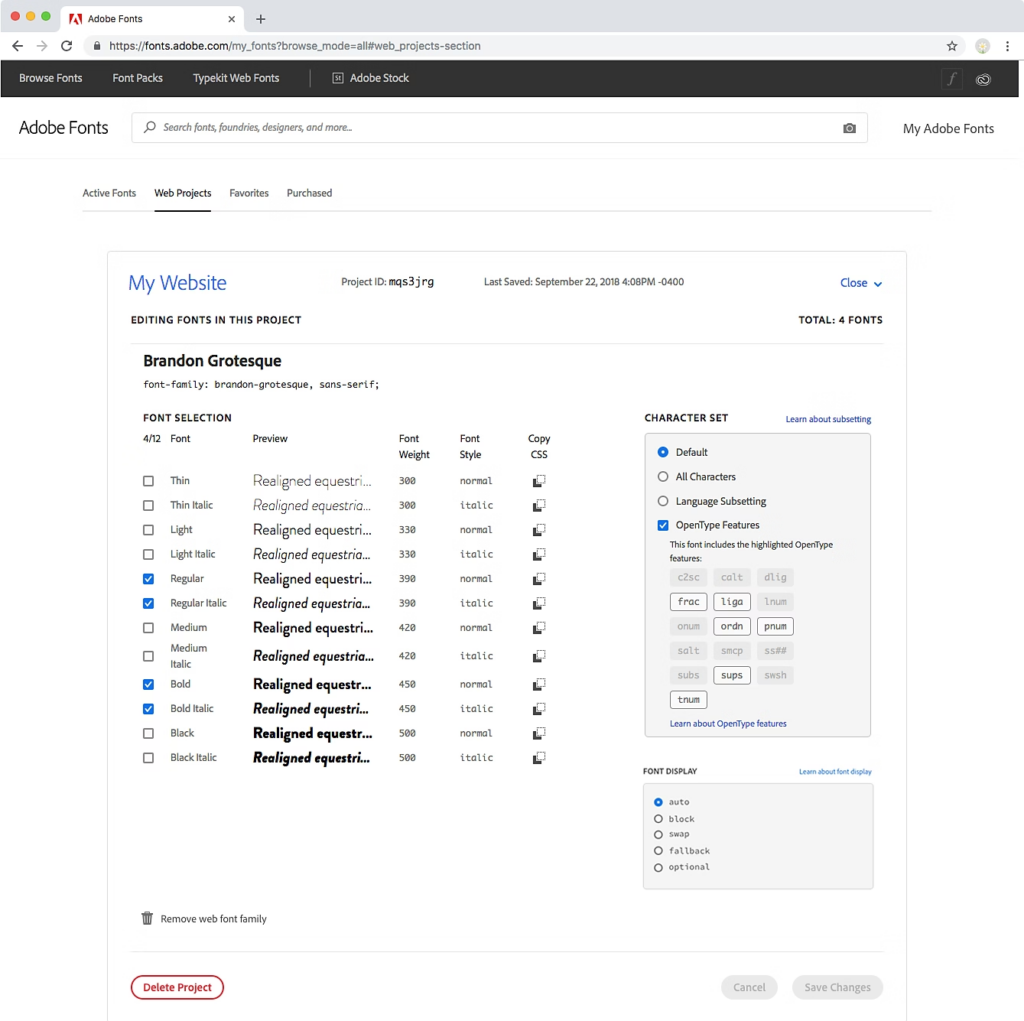
- Adjust font weights and styles;
- Remove fonts from the project;
- Configure font-display settings, which control how fonts load in browsers;
- Modify the character set to define language support.
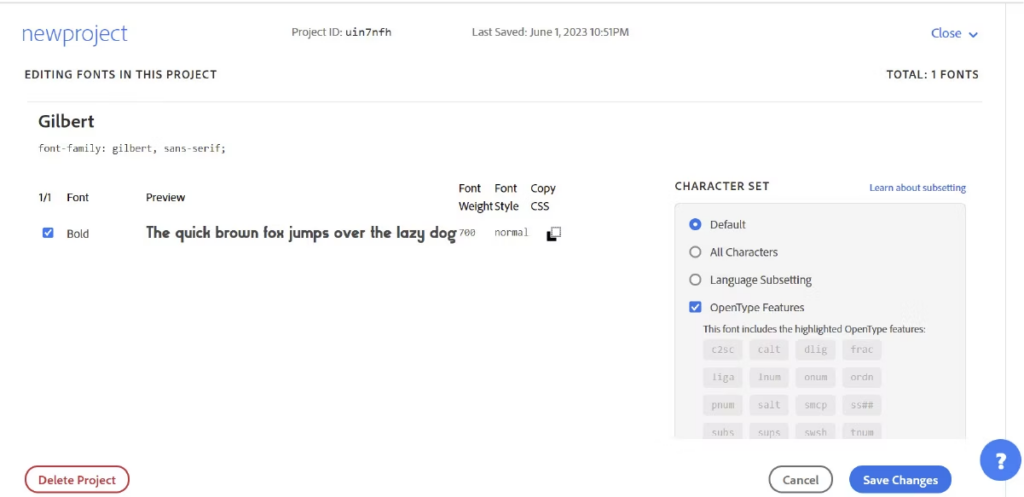
For East Asian fonts, dynamic subsetting is required, whereas other fonts offer subsetting options like Default, All Characters, or Custom Language Subset. The Language Support & Subsetting help page provides further details.
Enabling OpenType Features allows additional font capabilities, such as ligatures and alternate characters, to be included in the project.
Applying Fonts in CSS
Each web project includes a CSS font-family name, numerical weight, and font style. Use these values in your CSS to apply the selected fonts to your text.
Once configured, click Save Changes—updates will be reflected on your website within minutes.
Conclusion
Adobe Fonts provides a structured way to access and use a variety of fonts across web and desktop applications. By following the setup process, users can integrate fonts into websites, WordPress, and design software like Photoshop and Illustrator. The service allows customization of font selections, weight, and styles while ensuring proper licensing and compliance with usage terms. With easy management through the Adobe platform, users can efficiently apply high-quality fonts to different projects.