MySQL benchmarking is a practical method for evaluating database performance, helping to measure factors like query execution speed, system load capacity, and transaction handling. It allows database administrators and developers to detect bottlenecks, improve efficiency, and ensure databases operate effectively under various conditions. Using benchmarking tools such as Sysbench, HammerDB, and DBT2 makes it easier to analyze system behavior and make data-driven improvements.
Top MySQL Benchmarking Tools for Performance Testing
To evaluate the performance of a MySQL database, several benchmarking tools are available, each offering unique features for different testing needs:
DBT2 (Database Test Suite 2)
DBT2 is part of the Database Test Suite designed to simulate online transaction processing (OLTP) scenarios. It replicates practical operations for businesses managing various tasks, running a combination of read and write transactions such as New Orders, Order Entry, Order Status, Payment, and Stock Handling.
HammerDB
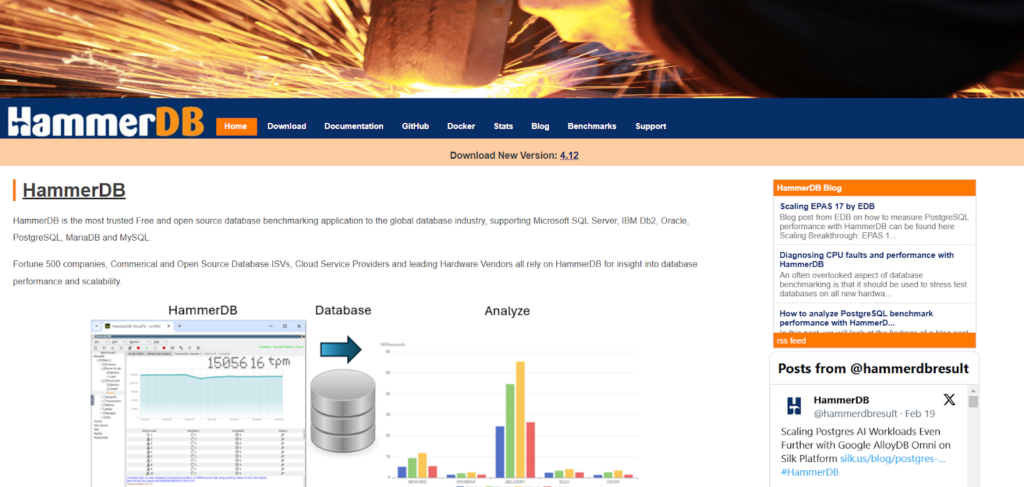
HammerDB is an open-source, cross-platform tool for database load testing. It supports industry-standard benchmarks like TPC-C and TPC-H, enabling users to assess MySQL performance under different load conditions. Its simple interface and adaptability make it suitable for both small-scale and large-scale testing.
Sysbench
Sysbench is a scriptable, multi-threaded benchmarking tool optimized for Linux systems. It includes pre-configured scenarios for testing MySQL OLTP performance and evaluating filesystem I/O, CPU load, memory usage, threading, and mutex handling. Its flexibility makes it effective for comprehensive system performance analysis.
Benchmarking MySQL Performance Using Sysbench
Sysbench is a versatile and scalable benchmarking tool used to evaluate MySQL database performance. It uses .lua scripts to create customized test scenarios. In this process, the Percona-Lab TPCC .lua workload will be used with Sysbench to showcase benchmarking on a Linux system.
Step 1: Add the Sysbench Repository and Install Sysbench
To install and maintain Sysbench using the system’s package manager, the first step is to add the Sysbench repository to your system. This ensures that Sysbench stays updated through the package manager. The process varies depending on the Linux distribution:
For Debian/Ubuntu
Run the following commands to add the repository and install Sysbench:
curl -s https://packagecloud.io/install/repositories/akopytov/sysbench/script.deb.sh | sudo
sudo apt -y install sysbench
For RHEL/CentOS
Use these commands to set up the repository and install Sysbench:
curl -s https://packagecloud.io/install/repositories/akopytov/sysbench/script.rpm.sh | sudo
sudo yum -y install sysbench
For Fedora
Execute the following commands to add the repository and install Sysbench:
curl -s https://packagecloud.io/install/repositories/akopytov/sysbench/script.rpm.sh | sudo
sudo dnf -y install sysbench
For Arch Linux
Sysbench is available in the official repositories. Install it using:
sudo pacman -Suy sysbench
After installation, Sysbench can be accessed using the sysbench command. Test scenarios and .lua scripts are located in:
/usr/share/sysbench/
To list the available scripts, use:
ls -l /usr/share/sysbench
Example Output
total 60
-rwxr-xr-x. 1 root root 1448 Apr 24 2020 bulk_insert.lua
-rw-r–r–. 1 root root 14369 Apr 24 2020 oltp_common.lua
-rwxr-xr-x. 1 root root 1286 Apr 24 2020 oltp_delete.lua
-rwxr-xr-x. 1 root root 2411 Apr 24 2020 oltp_insert.lua
-rwxr-xr-x. 1 root root 1261 Apr 24 2020 oltp_point_select.lua
-rwxr-xr-x. 1 root root 1645 Apr 24 2020 oltp_read_only.lua
-rwxr-xr-x. 1 root root 1820 Apr 24 2020 oltp_read_write.lua
-rwxr-xr-x. 1 root root 1114 Apr 24 2020 oltp_update_index.lua
-rwxr-xr-x. 1 root root 1123 Apr 24 2020 oltp_update_non_index.lua
-rwxr-xr-x. 1 root root 1436 Apr 24 2020 oltp_write_only.lua
-rwxr-xr-x. 1 root root 1915 Apr 24 2020 select_random_points.lua
-rwxr-xr-x. 1 root root 2114 Apr 24 2020 select_random_ranges.lua
drwxr-xr-x. 4 root root 49 Sep 20 06:03 tests
Step 2: Clone the Percona TPCC Repository from GitHub
The Percona-Lab TPCC workload is a TPCC-like benchmark designed for Sysbench 1.0.x. It differs from the standard TPCC workload in several key ways:
- Optimized Text Fields: It avoids fully random text fields, enabling the evaluation of various compression methods used by different MySQL storage engines;
- Multiple Table Sets: It supports more than the standard nine tables, offering greater flexibility for creating diverse testing scenarios.
For further details about this TPCC-like workload, refer to Percona’s official blog.
Before cloning the repository, ensure that Git is installed on the system running the benchmark. Use the appropriate package manager for your Linux distribution:
Debian/Ubuntu
sudo apt update
sudo apt install -y git
RHEL/CentOS
sudo yum install -y git
Fedora
sudo dnf install -y git
Arch Linux
sudo pacman -S git
Clone the Percona TPCC Repository
Once Git is installed, clone the Percona-Lab/sysbench-tpcc repository into the Sysbench directory using the following command:
git clone https://github.com/Percona-Lab/sysbench-tpcc /usr/share/sysbench/percona
Verify the Cloned Repository
To confirm that the repository has been cloned successfully, list the contents of the directory:
ls -l /usr/share/sysbench/percona/
Example Output:
total 92
-rw-r–r–. 1 root root 11342 Sep 20 06:04 LICENSE
-rw-r–r–. 1 root root 984 Sep 20 06:04 README.md
-rw-r–r–. 1 root root 12320 Sep 20 06:04 tpcc_check.lua
-rw-r–r–. 1 root root 21290 Sep 20 06:04 tpcc_common.lua
-rwxr-xr-x. 1 root root 1863 Sep 20 06:04 tpcc.lua
-rwxr-xr-x. 1 root root 28573 Sep 20 06:04 tpcc_run.lua
-rw-r–r–. 1 root root 1369 Sep 20 06:04 tpcc-scm-1.rockspec
With the Percona TPCC repository cloned, you are now ready to proceed with setting up and running TPCC-like benchmarks using Sysbench.
Step 3: Copy Percona TPCC Scripts to the Sysbench Directory
To ensure proper dependency resolution, the .lua scripts from the Percona-Lab/sysbench-tpcc repository must be copied into the main Sysbench directory. This allows Sysbench to recognize and execute the TPCC benchmark scripts without additional configuration.
Copying the TPCC Scripts
Use the following cp command to copy all files from the Percona TPCC repository to the Sysbench directory:
cp /usr/share/sysbench/percona/* /usr/share/sysbench/
This command transfers all relevant TPCC scripts and configuration files, ensuring they are readily available for use with Sysbench.
Verifying the Copied Files
After copying, list the contents of the Sysbench directory to confirm the files have been successfully added:
ls -l /usr/share/sysbench
Example Output
total 152
-rwxr-xr-x. 1 root root 1448 Apr 24 2020 bulk_insert.lua
-rw-r–r–. 1 root root 11342 Sep 20 06:07 LICENSE
-rw-r–r–. 1 root root 14369 Apr 24 2020 oltp_common.lua
-rwxr-xr-x. 1 root root 1286 Apr 24 2020 oltp_delete.lua
-rwxr-xr-x. 1 root root 2411 Apr 24 2020 oltp_insert.lua
-rwxr-xr-x. 1 root root 1261 Apr 24 2020 oltp_point_select.lua
-rwxr-xr-x. 1 root root 1645 Apr 24 2020 oltp_read_only.lua
-rwxr-xr-x. 1 root root 1820 Apr 24 2020 oltp_read_write.lua
-rwxr-xr-x. 1 root root 1114 Apr 24 2020 oltp_update_index.lua
-rwxr-xr-x. 1 root root 1123 Apr 24 2020 oltp_update_non_index.lua
-rwxr-xr-x. 1 root root 1436 Apr 24 2020 oltp_write_only.lua
drwxr-xr-x. 3 root root 158 Sep 20 06:04 percona
-rw-r–r–. 1 root root 984 Sep 20 06:07 README.md
-rwxr-xr-x. 1 root root 1915 Apr 24 2020 select_random_points.lua
-rwxr-xr-x. 1 root root 2114 Apr 24 2020 select_random_ranges.lua
drwxr-xr-x. 4 root root 49 Sep 20 06:03 tests
-rw-r–r–. 1 root root 12320 Sep 20 06:07 tpcc_check.lua
-rw-r–r–. 1 root root 21290 Sep 20 06:07 tpcc_common.lua
-rwxr-xr-x. 1 root root 1863 Sep 20 06:07 tpcc.lua
-rwxr-xr-x. 1 root root 28573 Sep 20 06:07 tpcc_run.lua
-rw-r–r–. 1 root root 1369 Sep 20 06:07 tpcc-scm-1.rockspec
Step 4: Prepare the Database for the Benchmark
Before running the benchmark, the database must be set up with the necessary objects, including tables, constraints, and indexes, and populated with data. This preparation ensures that the benchmark can run effectively and simulate practical usage.
Sysbench provides several arguments to customize and scale the test scenario. These parameters allow for flexible configuration based on testing needs and system capabilities.
- –threads specifies the number of threads that will run the operations, simulating multiple users accessing the database simultaneously. The more threads used, the higher the system resource consumption. Common thread counts include 8, 16, 24, 32, 48, 64, 96, 128, 256, 512, and 1024. The default is 1;
- –tables defines how many tables will be created in the database or schema. Increasing the number of tables can help simulate more complex structures;
- –scale (representing warehouses) sets the scale factor, effectively controlling the volume of data. Increasing both the –tables and –scale values results in a larger dataset and more rows for the benchmark to process. For example, using 100 warehouses with a single table set typically generates around 10GB of data in uncompressed InnoDB tables. Expanding this to 100 warehouses with 10 table sets results in approximately 100GB, while 50 tables with 500 warehouses can scale the dataset to around 2.5TB–3TB.
To prepare the database for the benchmark, first ensure that the database is created and accessible. Then run the following command, replacing the arguments with values suited to your setup.
sysbench /usr/share/sysbench/tpcc.lua –threads=48 –tables=10 –scale=100 –db-driver=mysql –mysql-db=sbtest –mysql-user=DBtest –mysql-password=’password’ prepare
This command initializes the database with the specified number of tables, the defined scale, and the chosen number of threads. The prepare phase will create the tables, apply constraints and indexes, and populate them with data according to the TPCC benchmark requirements. Once this process is complete, the database will be ready for benchmarking.
Step 5: Execute the Benchmark Test
To run the benchmark, execute the following command, ensuring the –scale and –tables values align with the setup used during the preparation phase. Adjusting –threads will increase the system load during the test, while modifying –time (in seconds) will extend the duration of the benchmark.
sysbench /usr/share/sysbench/tpcc.lua –threads=512 –time=300 –tables=10 –scale=100 –db-driver=mysql –mysql-db=sbtest –mysql-user=DBtest –mysql-password=’password’ run
This command initiates the benchmark, running multiple transactions under the defined conditions. Increasing the number of threads will intensify system stress, while a longer time frame allows for a more extensive performance evaluation.
Analyzing Benchmark Results
Upon completion, Sysbench provides a comprehensive report detailing key performance metrics. Focus on the following statistics for effective system comparison and performance tuning:
- Transactions Per Second (TPS): Reflects the number of transactions completed every second. A higher TPS indicates better performance;
- Latency: Represents the average time taken to execute each event, as defined in the Lua script. Lower latency values signify faster response times;
- Thread Fairness: Highlights the distribution of executed events across threads, ensuring even system utilization.
Sample Benchmark Output:
- Transactions: 2,336,949 (7,780.70 per second);
- Queries: 66,437,151 (221,197.66 per second);
- Ignored Errors: 10,365 (34.51 per second);
- Reconnects: 0.
General Performance Stats:
- Total Time: 300.35 seconds;
- Total Events: 2,336,949.
Latency (Milliseconds):
- Minimum: 0.54;
- Average: 65.75;
- Maximum: 18,566.21;
- 95th Percentile: 240.02;
- Total Latency Sum: 153,648,098.61.
Thread Fairness:
- Average Events per Thread: 4,564.35;
- Standard Deviation: 217.24;
- Average Execution Time per Thread: 300.09 seconds.
These performance indicators provide valuable insights into the system’s capability and highlight potential areas for optimization, such as hardware upgrades or configuration tuning.
Step 6. Cleanup the database
After completing the benchmark, it is essential to clean up the database to remove the test data and restore the system to its original state. Execute the following command, ensuring the correct table and scale values are used:
sysbench /usr/share/sysbench/percona/tpcc.lua –threads=48 –tables=10 –scale=100 –db-driver=mysql
For continuous performance optimization and to maintain system efficiency after cleanup, it’s important to implement MySQL database monitoring. This helps track key metrics, detect issues early, and ensure the database remains stable and responsive over time.
Conclusion
Benchmarking MySQL databases provides clear insights into performance, helping to identify areas that need optimization. Tools like Sysbench, HammerDB, and DBT2 enable accurate testing, allowing administrators to fine-tune database operations for improved speed and stability. Regular performance evaluations help maintain efficient database management and ensure systems handle workloads reliably.